When we hauled out in August 2024, we didn’t realize Rainshadow would be on the hard until mid June 2026. A variety of events lead us to not sail at all in 2025. We did work on Rainshadow in 2025, but the brutal work started in April 2026.
The major task during this extended haulout was to remove 50 years of bottom paint accumulation, repair hundreds of blisters, barrier coat the hull and repaint. The vast majority of this work started in April 2026.
The bottom paint needed to be removed because the build-up was too thick. Many large flakes had come off over the years. The bottom was very rough. There was a very poor adhesion layer from the mid 2010’s that meant trying to apply new paint too often put flakes of paint on the roller, rather than paint on the hull. It was just a mess.
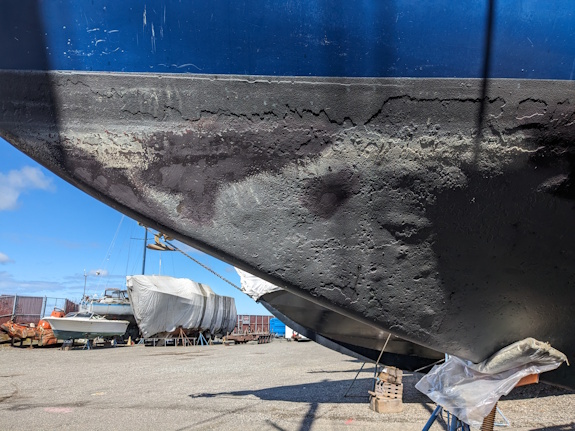
We removed the bottom paint with the aid of a chemical stripper. Putting on this goop meant we could scrap the paint off in wet globs. No boatyard wants to see copper bottom paint dust flying through the air. Wet globs landing on plastic, then plastic rolled up and properly disposed – that’s OK.
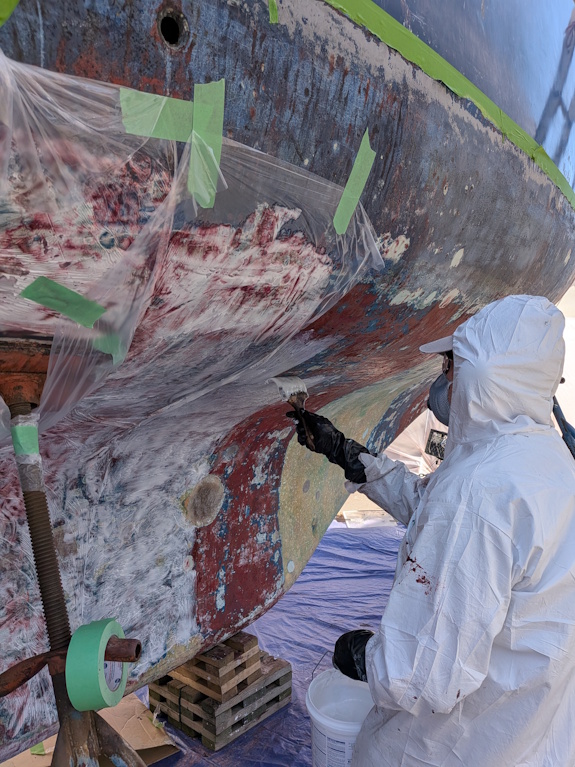
This was brutal work. It took 14 gallons of paint stripper, 10 weeks working 3-5 days a week, and many OTC pain pills to endure the elbow grease required to scrape off the heavy paint build-up.
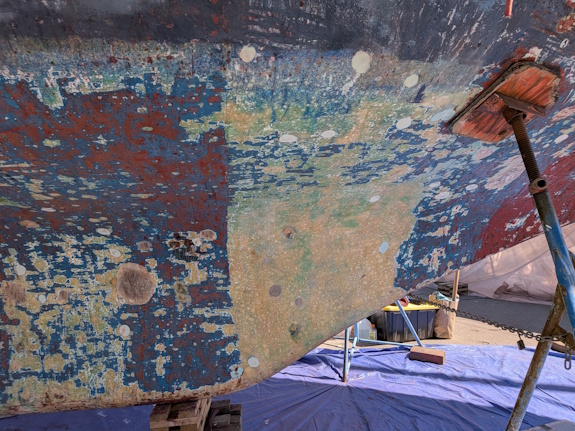
I never ever want to do that again. When we were only about half-way done, I actually wondered if we should have just bought a different boat.
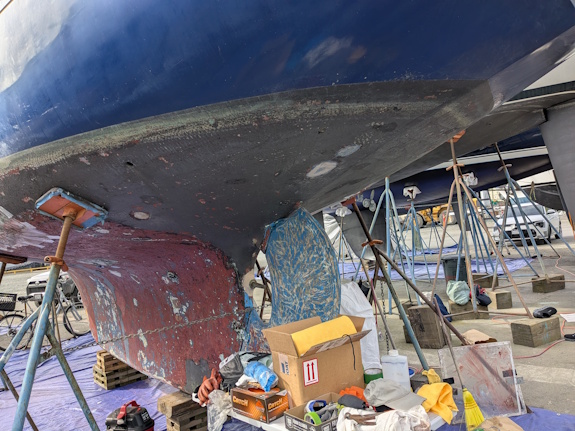
Removing the paint revealed hordes of blisters. We knew we had blisters. In fact, we had been working on repairing those since the haulout started in August 2024. Our first attempt at repairs tackled all the blisters that were weeping liquid a few days after the haulout. That’s not a good sign. So before departing for the winter in 2024, we opened 49 weeping blisters, stepping aside to ensure we did not get blasted by the liquid within that is under pressure. After letting them dry for 8 months, we repaired them in 2025 using the appropriate materials for the depth of the blister. But always with polyester resin on the advice of the local fiberglass whisperer. It is much easier to work with than epoxy, but as we learned later … (just keep reading) The deeper repairs we used fiberglass layup. Others we just used a filled polyester resin material. We thought that would be the end of the worst blisters – AKA worsters as I started to call them.
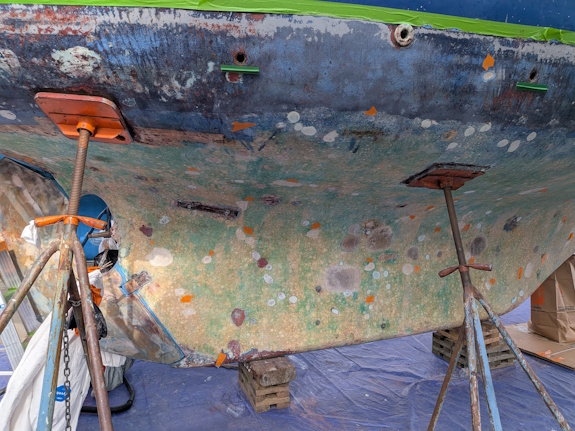
But once the paint was removed by the June 2026, we saw more large blisters we decided to open. After Rainshadow had been out of the water for 16 months, we didn’t expect to find blisters with liquid inside. The liquid was no longer under pressure, but a some drooled liquid down the hull after we ground them open. Ugh. We kept grinding until there was no delamination left. In some cases that meant we ground out big, deep areas.
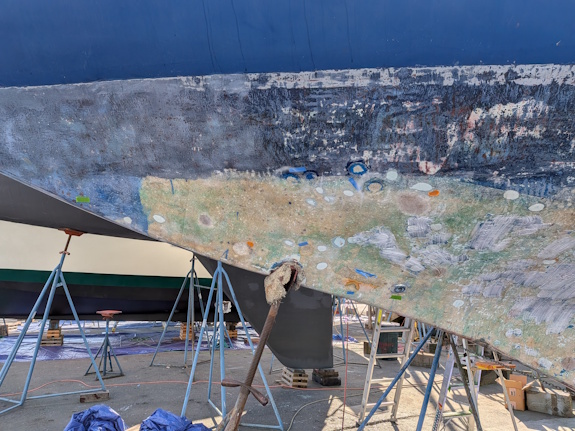
This time all repairs were done with epoxy resin. Every repair started with saturating the surface with Silver Tip epoxy. Then while still in the chemical bond phase, we would choose the appropriate filler. Fiberglass mat or cloth layup for deep big areas. If not that deep, we used EZ-tex, a pre-made structural filler. For fairing we used QuickFair. This all worked well, we followed the manufacturer instructions carefully.
Saldy, we discovered that a few of the polyester resin repairs we had done in 2025 were already failing. We could see a crack forming between the hull and filler. Using a putty knife, we could pop out the polyester filler material. Obviously, our surface prep was insufficient. So we carefully checked all the prior blister repairs, whether done by us or someone else. Any hint of a crack, we’d grind it out if we couldn’t pop it out. We also discovered failures in the blister repairs made before our ownership (pre-2009) resulted in severe damage because the fiber layup was exposed once the filler adhesion failed. These were some of the most severe delamination areas to repair. Note that almost all blister repairs had not been done with epoxy. It was easy to tell when sanding because epoxy is much harder than either cured polyester or vinyl ester.
A fellow boater in the yard told us she thought the bare hull of Rainshadow was beautiful – sort of like a Monet painting. That helped me look at it all in a different light.
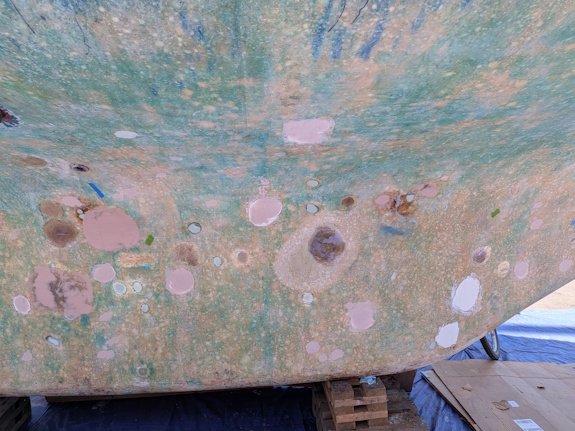
The green color in the bare fiberglass is absorbed copper oxide from the bottom paint. When we worked on blisters with liquid, our metal tools would get a thin copper plating.
Another place needing major repair was the hull under where the dynaplate had been for decades. We removed it because the thru-bolt seals were starting to leak. Once removed, we discovered the hull mat layup was starved of resin: it looked like white ice, some of it delaminating. We ground the delaminated material, but left the white stuff if it was sound. Then we re-wetted it using Clear Coat epoxy, which is very thin and wets out well. This worked great. After that, we did mat layup to repair the damage and glass closed the former thru-bolt holes.
More fiberglass work included glassing closed the former depth sounder hole and the unused cockpit drain seacock. Both of these were on the port side. Also did repairs to the zinc area, and replaced the through bolts with 3/8” fine threaded rod to make it easier to connect on both sides.
Final hull repair work was to fix almost all the dings in the foot of the keel from various times we’ve kissed the ground, or perhaps hit a rock, log or ice chunk. Nice to have tough old boat with an encapsulated keel.
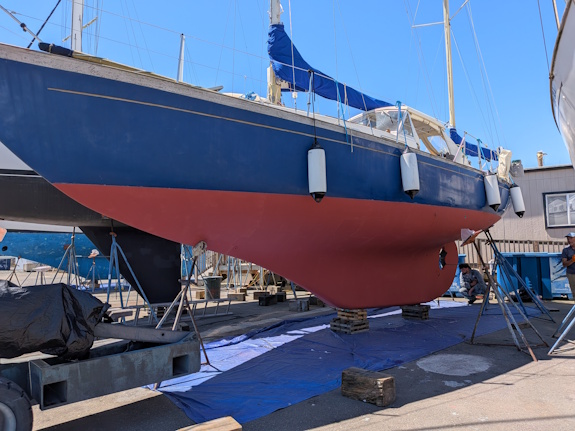
After all that blister repair was done, then we applied Pettit Protect as a barrier coat using 3/8” nap roller. We put on a total of 4 layers, alternating colors grey:white:grey:white. Using the correct timing after the last coat (per Pettit directions), we applied the first coat of Pettit Hydrocoat Eco using a 5/16” roller. First coat was a blue-green color. (The white spots next to the jack stands are Pettit Protect – we were playing the boat stand shuffle.)
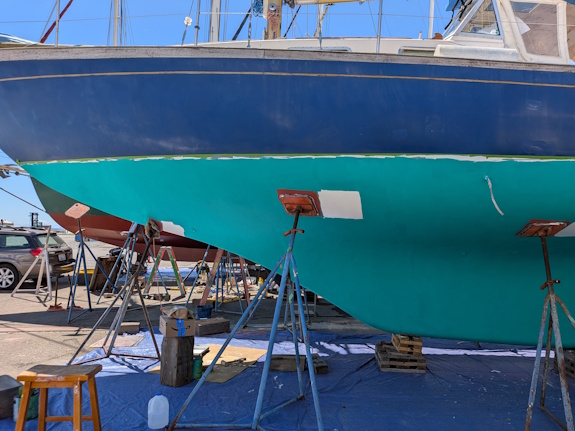
Second coat applied was red. Varyinig the colors means we can tell how the paint is wearing. Hydoocoat Eco is copper-free – it has a zinc biocide instead, as well as another biocide. It takes 1 gallon to do one coat of our hull – as long as it’s put down thin per the directions. We were very careful to follow the manufacturer directions though all steps: epoxy repairs, barrier coat, bottom paint. We want it to stick. In the end, Rainshadow looked good.
There were many more repairs during this extended haulout. Let me just list them here.
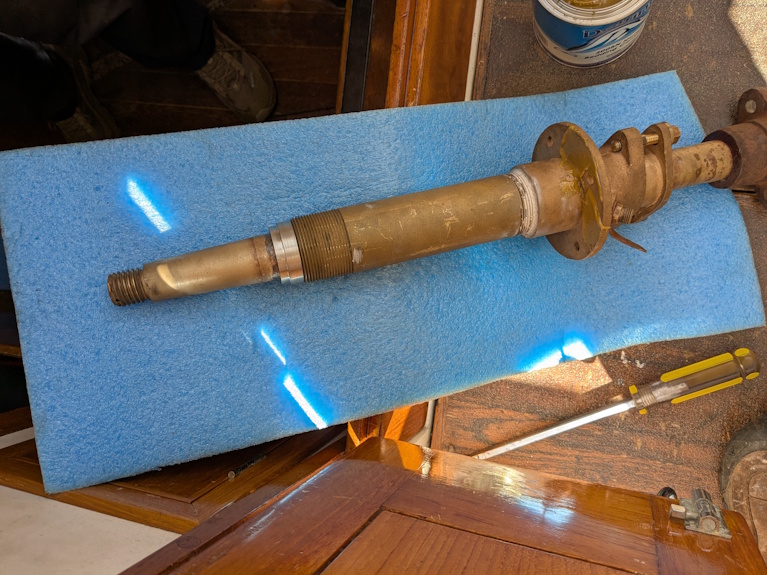
- We replaced the white metal bearing, which is the alternate to a cutlass bearing for the prop shaft. We had Pete at Port Townsend Foundry cast 2 for us. Only one has its ID machined to fit our shaft; that’s the one we installed. The other casting is for the next time the bearing needs replacing. It will still need to be machined for the prop shaft size at that time, but it fits nicely into the shaft log. Pete also sand blasted the tail shaft, intermediate shaft, flanges and the stuffing box. He custom made new SAE threaded rods for the stuffing box, replacing the original failed BSF threaded rods. He made a new castle nut for the prop. I clean up and re-painted the steel flexible couplers before installing them again. All this was major work, and would have been the headliner item if not for all the bottom paint and blister repair work. It is also the second time in our ownership we replaced the white metal bearing. Details of the process were provided in that first-time posting.
- Van did major repairs to the boom. The connection of the boom to gooseneck was failing due to corrosion. Van rebuilt it after much thought about the right way to install new fasteners to deal with the forces. He had the gooseneck part reemed out so a bronze bushing could be installed. He also had the failed boom slider ring drilled out by machinist. Van rebuilt the outhaul using dyneema. His hope is that dyneema will not twist up the way the previous orange line has done. Time will tell.
- Installed a new seacock on the port side under the galley sink for the saltwater foot pump. The new location makes for a very short hose run, which is ideal to avoid stagnate seawater in the hose run.
- Van installed a hose connection deck fitting for the washdown pump on the aft deck. Also replumbed the inside. It’s very nice to have a washdown pump when hauling the anchor.
- We replaced the skylights in the cockpit roof. We designed a new hold-down technique to avoid having to drill holes in cast acrylic material, which promotes cracking. All new holes in the roof were properly epoxy sealed to protect this cored layup (i.e. pitch pockets).
- When replacing the skylights, we discovered the plywood core is wet and swelling. This caused cracking of the too-thick gelcoat on the coach roof top. We ground out all the gelcoat cracks and filled them with 3M Premium Filler, which is a vinyl ester product. All cracks are under the flexible solar panel, so we had not seen them until we removed the panel to replace the skylights. To try to solidify the wet plywood, we drilled many holes then used bent nail to ream out wet wood. All holes were backfilled with epoxy. These repairs were holding in 2026, though a new crack appeared. That means the plywood is still getting wet somehow. A future repair required.
- I cleaned up all exterior weathered teak by first sanding the grey away. Then I applied 2 coats Daly’s Seafin Sealer followed by multiple coats Daly’s teak oil.
- I refinished the companion way doors, washboards, cockpit locker doors, lazarette seats, helm foot step, aft head door, and the cutting board shelf from galley. I used McClosky Spar varnish. When installing cockpit locker doors, we repaired screw holes and replaced hinges as required.
- I made some repairs and patches in the cockpit canvas. The canvas material is starting to crack in places. The window material is holding up very well.
- Van took apart the head pump – it was allowing back flow. It proved too challenging to replace the duck bill or flapper because of the stupid design and our shoe-horned install location. He cleaned surfaces best as possible, and also used Salt Away to remove deposits. Thankfully its working properly again in 2026.
- Van replaced the bow roller with a custom roller he made from FRP discs. Later when using it in 2026, he learned the portion that the chain rides on was wearing too fast, so he replaced that middle FRP piece with stainless steel fender washers. That is wearing better. The problem with the purchased bow roller is that it rolls the chain when raising the anchor. That leads to many twists in the chain, and eventually a mess to unwind. The original bow roller had chain-sized grooves to stop the chain from rolling. Unfortunately that original bow roller finally wore completely through in 2016, so we’ve been searching for a suitable replacement since then.
- We took the broken SSB radio directly to Icom in Kirkland for repair. The IC-M802 model is discontinued, but they still had parts to repair it. We reinstalled it in 2025, and got it working again in 2026.
- Ordered teak from Eden Saw to repair the damage from the Prince Rupert marina disaster. It has not been installed yet.
This haulout was a very long hard process. It’s good to look after our trusty old boat to ensure she remains a trusty old boat. It would not have been so bad if we hadn’t ignored the failing bottom paint and blister problem for so long.
Finally on June 18th we splashed. Then on the first day of summer, we set off for our summer cruise. Exhausted by the effort, but happy to be back on the water.