Summer 2011 Haulout
June 21st, 2011 | by Marilyn | Published in Haul outs, Maintenance and Repairs
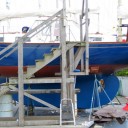
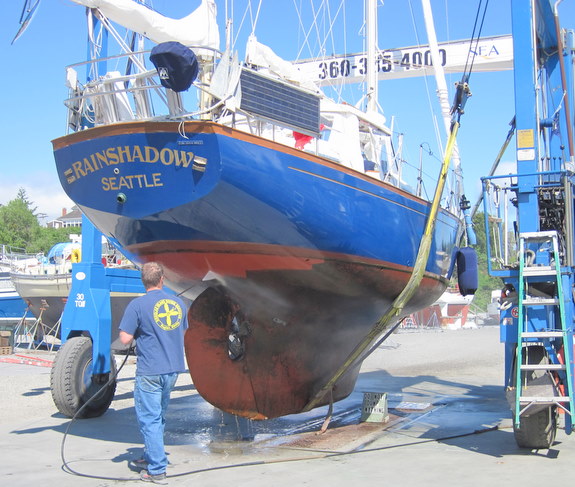
We hauled Rainshadow at Sea Marine in Port Townsend for a week, starting June 13th. We had a nice stay there. Sea Marine pushed a staircase along side the boat, so I could climb aboard (I certainly would not be able to climb a ladder). So we lived aboard on the hard, and worked on her every day. Weather was pleasant enough (read, very little rain) – it was a nice “vacation” even though Van slaved away on the boat non-stop.
She needed hauling for several reasons – some of which were just us getting familiar with everything below the waterline since this is our first haulout since the pre-purchase survey:
1) It time for a new bottom paint job. Her bottom was painted with West Marine CPP about 25 months ago. It looked quite good, only a few barnacles at the bottom of the keel, which washed off easily. The pressure washing removed a lot of bottom paint though, so it was time to recoat. We used up the left over WM CPP to make a WIDE red boot stripe, and used some leftover (from our previous boat) Petit Ultima SR Blue on the keel and rudder. Both are copper-based ablative, so its no problem and once back in the water, no one but the fishes will know anyway. I am happy to say, there were no blisters worthy of repair.
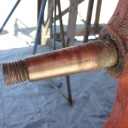
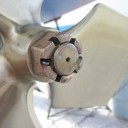
2) We needed a new prop. The old 16” dia -12” pitch 3 blade screw was badly corroded and the edges were chipped. We were overpropped, and had bad cavitation problems. We put on a new Axiom 16” dia –19.5 degree (they don’t spec by pitch). We’ll give a big report on this latter, once the story unfolds completely – but the short version is that the new prop blades are too close to the deadwood, so we are getting excessive percussion noises above 2000 RPM. Axiom is making us a brand new prop that will move the blades aft. We eagerly await its arrival (expected around mid-July). One bad thing is the castle nut is looking pink, and one corner of it chipped. It’s a 1” BSW – yes, Whithworth thread – so not easily replaced. I sanded it, and discovered better metal, so we are hoping it will last longer. The shaft is looking quite good.
3) We needed to replace the galley sink drain failed gate valve with a Marelon thru-hull and seacock. During this replacement, the custom tailpiece sheared right off with little force. Very glad this happened while we were sitting on the hard! The gate value stem had failed, and the gate flopped controllably. The Marelon replacement is good. The only mistake we made was epoxying down the backing block with the thru-hull dry-fit, and after that cured, scraping away the uneven bottom paint build-up under the thru-hull mushroom. That meant when we used Sikaflex 291 to bed the thru-hull, it did not fit as snug against the hull as it did when the backer block was being epoxyed, since the paint “shim” was no longer there. Anyhow, it’s great to have a thru-hull that works so easily and can be closed to stop the drain making noise when the conditions are just right for it to gurgle.
4) We needed to maintain the Blakes seacocks. They look amazingly good for being 37 years old. The head outlet as the worst surface corrosion (not surprisingly) given the local chemistry, but it seals well. The head inlet had been leaking, so we lapped it using a NAPA valve lapping compound. That was pretty aggressive. We ended up stealing the grit from 400 grit emery paper and lapping more with that to try to remove the scoring from the valve grinding compound, and then ultimately used jewelers rouge. Once lathered with Blakes seacock grease and reassembled, it now does not leak and turns very nicely. Lesson learned – don’t use a common valve grinding compound on the soft bronze of the seacock. We also freed the aft head inlet Blakes, which had not been turned for maybe 20+ years. It cleaned up nicely using just jewelers rouge. We may use it for a new saltwater galley supply. We tried to free the Blakes aft head outlet, but it didn’t want to budge after not being used for 20+ years. We have no use for it, so we just left it.
5) The defunct aft sink drain thru-hull was capped with no seacock. We don’t have a use for it either, but I wasn’t comfortable with it. We considered glassing the hole closed, but that’s a lot of work. Instead, we got a marelon thru-hull, scored the inside diameter and then filled it with wood-filled System Three epoxy. Then we bedded it to the hull using Sikaflex 291. We still have a thru-hull with no seacock, but this one is fully plugged rather than capped, and not 37 years old.
6) In the engine room area, we inspected the raw water intake seacock with its groco seacock (without disassembly) – it looks good. We did nothing with the capped cockpit drains. We disassembled the bilge outlet gat valve, which still works. The tailpiece on it is badly green corroded, but it did not snap off with some reasonable pressure applied. Since the gate valve works, and this is above the waterline at rest, we decided to let this replacement go for another day.
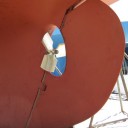
7) We carefully inspected the rudder. It dripped from the bottom pintle area the whole week it sat on the hard, so its clearly taking on water again. We could see at the rudder post junction with the rudder that the fiberglass “collar” is starting to delaminate again. The PO said he had the rudder reglassed maybe 10 years ago to get rid of blisters and try to stop the water ingress by renewing the fiberglass at the same junction that has failed again now. There is a very very slight bit of free play between the rudder and the rudder stock – just enough to see that fiberglass junction move a hair. Once new bottom paint was applied over it, the movement could no longer be seen. We also carefully scratched an edge of the middle gudgeon because a sister ship had this completely fail from galvanic corrosion. Ours looks like good strong bronze still. Also, the lower pintle/gudgeon assembly seems to still have a good shoe – the rudder is not riding on the lower gudgeon as it would be if the pintle or shoe had failed completely. So – likely some anaerobic corrosion going on inside of the rudder because of the water ingress, but maybe the movement at the top, and the leak at the bottom means there is some water movement in and out of the rudder body, which might actually help some.
8 ) We repacked the packing gland on the stuffing box, which requires a 5/16” packing material. We chose to install Tefpack, which is a synthetic yard with teflon coating. It did have a “dripless” packing between 2 coils of flax. That stuff was nearly rigid, so the job was badly needed.
9) We thought about replacing the white metal bearing in the stern tbe, but we just couldn’t get ourselves to take on such a big job. If you read this blog closely, you’ll know we had a THUMP-THUMP happening last fall when under sail moving >3 knots are so. That turned out to be an improperly greased white metal bearing. We had the mistaken impression from the PO that with the “dripless” packing material, the stern tube greaser was no longer required. No way. The grease is for the white metal bearing in the stern tube, not the stuffing box!! Once we started turning down that greaser again, the thumping stopped. The bearing is worn now, but maybe not bad enough to replace it. We really want to go sailing this summer, and not spend a long time on the hard. We both hope this was not a bad mistake. If we are wrong, the causality may be our gearbox…
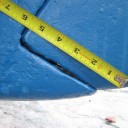
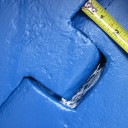
10) We also replaced the zinc. We rebedded new longer bolts so we could put on a 1” thick bar, cut 1.75” wide from a 12” sheet. The indent could handle a 14” length, but 12” is all we could find. We also made new bonding wires out of 6AWG and added a new shaft brush. The bonding to the zinc plate was very dodgy before, hence the pink and brittle screw prop that needed to be replaced.
It was good a week. We are disappointed about the prop, but very happy that Axiom is very willing and eager to work with us to find a solution. Hopefully we will be reporting happier news soon!
- Life on the hard. The staircase made it possible for me to live on the boat for a week.
- The prop shaft, looking pretty good.
- Here’s what the Axiom prop looks like. This is before the bottom paint job was done.
- The castle nut looking a little pink. Note the chipped edge by the cotter pin on the left.
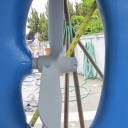
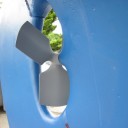
- A closeup of the Axiom prop (after the paint job). It shows the blades come too close to the deadwood.
- I just like this photo of our nifty looking Axiom prop
- On the rudder, the lower shoe must still be good because there is nice gap there
- On the rudder, the middle gudgeon looks like it might be rubbing on the top surface, so maybe the lower shoe is somewhat worn.
- This is the rudder stock where it enters the top of the rudder blade. This is the location of the hairline movement – no longer visible now that its been repainted.
- This is the raw water intake filter housing in the engine room. It’s a straight shot out the seacock, so if it gets clogged, we can clear it from inside the boat.
- The new zinc in position. Hopefully a thicker zinc will last well enough between paint jobs.
