Haulout 2013
February 14th, 2014 | by Marilyn | Published in Haul outs, Maintenance and Repairs
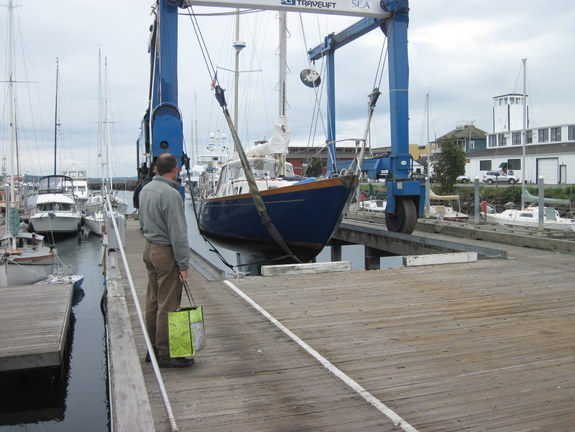
Rainshadow spent a month on the hard at Sea Marine in Port Townsend starting in late September so we could complete the following maintenance tasks:
– Bottom paint, which was the reason why we chose this time to haul out. Rainshadow had a green beard at the waterline all summer. We had Sea Marine apply the bottom paint higher on the topsides to avoid having the boot stripe below the waterline when we are heavily loaded. We just learned from Sid, the PO, that he had moved the boot stripe up as well – and perhaps did not get it level with how she sits. So we asked Sea Marine to try to make it more level, as it appeared to be higher at the front.
– The biggest task was to rebuild the rudder, which is described in detail here. Also replaced the rudder shaft packing with 0.325” diameter flax, 5 wraps.
– The second big task was hauling the main mast to do the following:
a) Add proper connectors at the mast shoe so the mast can be easily disconnected for hauling. Also added improved chafe protection at top and bottom.
b) Ran 14-2 round wires for a Windex light. Replaced the Windex 10-32 bolts.
c) Replace the Data Marine anemometer 10-32 bolts. Moved its wires to behind sound deadening so they will no longer slap around.
d) Remove the separate deck light and steaming light, and replaced them with an Aqua Signal Series 25 combo. Added new wires for the new light.
e) Replace the lamp in the masthead tri-color with an LED bulb.
f) Re-rivet loose mast steps.
g) Remove the white turnbuckle plastic covers as they seem to be causing corrosion due to lack of rainwater bathing.
h) install a new mast boot.
i) wax the mast
j) Add an insulator to the port side spreader so in the future, the port side shroud can also be used as an antenna –though will need to add an insulated terminal to complete this. Starboard side spreader already had an insulator installed by us a couple years ago when the cap shrouds were replaced.
k) Add a LeFeill staysail bracket so we can have a solent stay.
l) Replace the coax cable for the VHF antenna.
The other tasks were not so hefty, but still important.
– Replaced the prop shaft crown nut since it was quite pink. The new nut was custom made by Pete at PT Foundry.
– Service the seacocks. A few points worth mentioning:
a) the bolts on the head inlet Blakes seacock were cross-threaded and so replaced with silicon bronze bolts.
b) disassembled the Groco engine intake seacock. There are no replacement parts available for this older style Groco. Simply cleaned it and replaced the bolts and lock nuts.
c) Removed the former aft sink drain plug and replaced it with a marelon 3/4” thru-hull and seacock. We might use this for a watermaker some day.
d) While cleaning the main bilge outlet seacock, the gate valve failed. We could not get a 1 1/2” marelon seacock on time, so we simply installed a new marelon thru-hull and direct plumbed the Rule bilge pump to the outlet. We must add a seacock next year, which can be done in the water since the thru-hull is above the waterline at rest.
– Added insulation to the engine exhaust in the engine room before the mixer. Ballard Insulation made us a very nice custom-fit sleeve – see photo below.
– Cleaned the speed log carefully and figured out how to pull it while she is in the water, because it frequently fouls. Going in reverse sometimes solves the fouling, but other times it just won’t spin free so we need the ability to pull it. Also replaced o-rings, and applied bottom paint to the log according to the manufacturers directions in the installation manual.
This was a hard month of work, which poor Van had to do alone while I was with my ill sister in California. I wouldn’t have done so well on the boat anyway during the cold October weather – but I wish I could have been there to help.
-
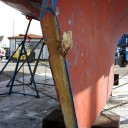
- The rudder was removed for rebuilding
-
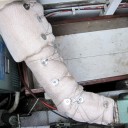
- Ballard insulation made this custom fit exhaust insulation for us. Very nice.