Fresh Water Tank Repair
August 31st, 2010 | by Marilyn | Published in Maintenance and Repairs | 4 Comments
The problem was that our fiberglass fresh water tank (located in the keel under the cockpit sole, about 100 gallons volume) was blistered and had spider cracks. It was still sound, but the water quality was poor due to the styrene leaching into the water from the venting blisters.
We figured we had the following repair options:
A. Remove the tank and install a new one. The problem with this approach is made clear by an email from Jeremy Lines: The water tank is 4′ x 3′ x 2′-1″ so will not go through the doorway. It is also partly structural where it is matted in along the sides and at the forward end.
B. Cut out the top of the tank and install new bladder tanks inside. Either a couple stock size bladders could be inserted, or a custom bladder could be made. The custom bladder supplier I talked to reckoned the bladder would only last about 5 years, and would cost about $750. So this is a costly option with a limited lifetime. (Note added later: We eventually did this option after our first attempt described below failed, but the idea of a bladder failed as well. The custom-made bladder was well-built to our specs, but the odd shape of the tank made it really hard to get it to lay inside perfectly, so there were always wrinkles and folds that we hard to clean. And it made the water taste and smell like plastic – so we abandoned it after less than a season of use. Now back to the saga as originally written.)
C. Cut out the top of the tank, and install a polyethylene rigid tank. This seemed reasonable, but again we have problems getting a tank through the companionway door, so would likely lose some volume. Also, tanks of this size are pretty pricey, and shipping is not cheap either.
D. Cut out the top of the tank, and do surface repairs. This is the option we decided to use. But then the next question was, repair with what? Epoxy coating is an option, but the blisters underneath would probably continue to vent, and this brittle epoxy coating would fail. (Others had reported this problem with epoxy paint repairs). We needed a flexible coating, sort of a paint-on bladder approach.
We finally settled on using Sanitred materials called Permaflex and LRB, which are rubber-based coatings. They make some wild claims about this miracle material, so we decided to have a go.
****Update May 2011 – This approach is a terrible failure. We do not recommend using Sanitred to coat the tank because it continuously leaches oil into the water. Sanitred swears the oil stops being produced, but after leaving the tank for 8 months overwinter, there was at least 1/2 cup of oil in the tank – it was like sludge. The surface has also gone yellow, and the blisters from the fiberglass are causing the Sanitred materials to blister up too. In some cases, the Sanitred has enough elasticity to handle the venting fiberglass blisters – in other cases the Sanitred layers have burst. The end result is a tank that contains oily, smelly water. YUCK! ****
For those who want to know about this failure, here’s what we did:
1. Let the tank air dry for about a week. Goal was to learn if the blisters would continue to vent brown goo. They didn’t seem to.
2. Use a jigsaw to cut off the top of the tank. Save this lid, and in all the coating steps listed below, make sure its inside gets coated too, as this lid will be reinstalled at the end. (To be honest, we didn’t do this as step 2 – we tried to do everything from the portholes first. But after many nasty bruises, we cut off the top because reaching all the corners was just too hard with the top in place. We should have done this step at this point, so I report it here.)
3. Hand sand the surfaces. This was tough work but only took a few hours. We did not try to do any blister repair. We just wanted to roughen the surface to get better adhesion for the Permaflex.
4. Wipe down the tank with acetone to ensure the surface is clean.
5. Mix Permaflex according to directions, and paint it onto all surfaces. This stuff is thick, so hard to spread. **See note below this list about what we should have done **
6. Wait a few hours and then mix more Permaflex and paint on second coat.
7. At this point, we went home for the night in hopes that the oil film Sanitred warns about would not form in the cool evening temperatures. Bad decision. After 8 hours, there was an oily film on the Permaflex, so we needed to wipe the surface down with acetone before we could start again. Nasty. If these steps are followed, start on the next step as soon as the second coat of Permaflex is applied (while still wet) because the next step takes a long time and the materials will reportedly adhere even if the bottom coat is not fully cured.
8. Make a mixture of LRB/TAV with no water as catalyst because TAV is a catalyst. This makes a toothpaste like mixture that can be pressed into all corners. This was very hard and very messy. The LRB/TAV mixture is light blue in color, and when we were done, there was light blue blotches all over from the slop that occurred while trying to reach the corners.
9. Mix LRB with water as catalyst, per the directions. Apply a coat, only to find out that the material is off-white yet translucent so the blue blotches show everywhere. It looked terrible and will make it very hard to tell if the tank is clean later in life.
10. With the approval of the helpful support staff at Sanitred, we decided to apply another coat of the opaque Permaflex to try to cover the blue blotches of the LRB/TAV mixture. Since the Permflex creeps so much prior to curing, it was hard to get sufficient coverage on the large blobs of LRB/TAV mixture, so the blue color still shows through somewhat. BTW, we had to clean the oil off the walls again prior to this step. Frustration is pretty high at this point.
11. Apply a final coat of LRB +water-as-catalyst mixture.
12. Wait for it to cure and then wash off the oily surface with soap and water, again and again and again. The oil keeps coming back, though the folks at Sanitred insist it stops forming after full cure (about 24 hours). They say we are not doing a sufficient job of getting the oil removed, instead we are just smearing it around. Not clear who is right. We are using cold water and soap to clean tank, and perhaps warm water as they suggest is required but getting several gallons of warm water into the tank is not easy because we’d have to heat it all on the stove.
13. Time to reinstall the lid. We made some tabs out of Aluminum barstock that are bolted between the lid and tank to hold it in place. We then used 3M 5200 to seal the gap. This was not hard to do, and it was definitely worth cutting the lid off the tank to do the work.
**Note: If we were to do this again, we would have applied the Sanitred coatings in this order: 1) LRB/TAV mixture into corners; 2) base coat Permaflex; 3) second coat Permaflex; 4) top coat LRB. This would hide the blue colored LRB/TAV mixture well and achieve the goal of a rugged impermeable yet flexible coating. And we would do all coats in one day so there was not chance for the oily film to appear between coats.
The Sanitred approach seems to have sealed the tank and the coats are well adhered from the start. I’ll periodically provide status to indicate how this repair is going. The repair was made in late June 2010.
Status August 2010: A few of the fiberglass blisters are venting under the Sanitred coatings as evident by the bubbles with brown goo under the Sanitred coatings. The Sanitred materials are holding up so the styrene goo is not making it into our water. Because the oil film that forms on the cured Sanitred products continues to plague us, we are not able to drink this water directly. It has an unpleasant smell too, just like the Sanitred smells while applying it. The oil sheen on the surface is less each time we wash it out, maybe we’ll get rid of it all eventually. We are using about 1.5 Tbspn of bleach per 100 gallons of water to preserve water quality. The water is definitely usable for washing, but we are carrying drinking water separately.
Status May 2011: As I wrote higher in this post, we do not recommend the Sanitred approach. The surface never stops leaching oil, so the water in the tank is polluted and smells strongly of Sanitred materials. Cleaning the tank and the lines is a real chore. We found that hot water and dish soap doesn’t clear the oil away, as the Sanitred documentation says it will. Though their website says “most solvents are OK” the printed documentation provided with the product says not to use alcohol. Eight months after application, we forgot about that ‘no alcohol’ warning – and rubbed it down with alcohol. It’s did not change the problem or affect the surface as far as we could tell, but the use of alcohol meant that the manager as Sanitred blamed the entire failure on its use – despite the fact that we only used it AFTER the problem existed for about 8-9 months. We’re at wits end with this, and have a nasty water tank problem on our hands. We bought a custom bladder so we could keep cruising while we sort out what to do with this problem.
Status May 2012: After pulling out our plastic bladder for winter storage, and leaving the sanitred-coated tank exposed to air over the winter, we’ve discovered it has FINALLY stopped leaching oil. Maybe if finally cured? Who knows. We cleaned it with soap and water, and refilled it for use at the dock. All is OK now, and the water no longer reeks of Sanitred smells (though we wouldn’t dare drink it). So if you can apply this product and afford to wait for a couple years if something goes amiss – maybe it will eventually meet your needs for a non-potable water supply.
Status Spring 2013: The Sanitred continues to be a problem. In frustration, we scraped all the Sanitred out of the tank, using brute force. Some of it came out in sheets, other parts were better bonded to the surface so it had to be scraped off with a putty knife, which did some damage to the gel coat. But it’s gone now – good riddance. It was a mistake to be worried about the venting blisters in the first place. To resolve the problems with any styrene in the water, we installed an inline charcoal and particulate filter in the fresh water supply line. We chose the Omnipure K5522-BB Carbon Block Water Filter because it works well at the lower pressures of our house water system (that is, lower pressure in comparison to a house water supply pressure).
Status Fall 2015: We continue to use the Omnipure filter setup, and keep the tank clean. We’re happy with this solution – the water tastes good. It’s not obvious that the blisters are still venting – maybe we just keep the tank clean enough during our 3-4 month cruising season
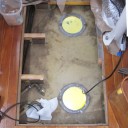
- The dodgy tank before the project began. See the blisters and few brown spots on sides? It looked much worse in person. The camera is held inside the tank to take this photo
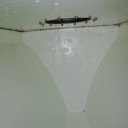
- The lid cutout setting on top of the tank, upside down so the Sanitred coating could cure
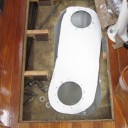
- After the LRB/TAV mixture has been applied into corners. See the blue blobs all over? It was very hard to get the material just into the corners, hence the tank is spotted blue/white now
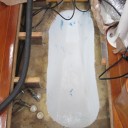
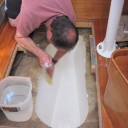
- Van working hard on cleaning the oily film off the cured surfaces. This is much easier to do when the tank lid is cut off. Notice the final white coloring of the surface, after we covered the blue spots with another layer of Permaflex and then LRB. Also notice there are no baffles in this large tank. Odd, but we didn’t change it.
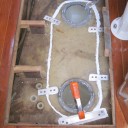
- The job finished. The cutout lid is held in place with aluminum straps and the gap sealed with 5200
September 20th, 2011at 12:26 pm(#)
You’ve been using bleach huh? All of Sani-Tred’s literature says NOT to use bleach or anything containing bleach. It also says not to use alcohol.
If you called Sani-Tred and honestly told them what you have been dong I’m sure they would tell you the obvious. Perhaps you did contact them.
It sounds like you have been doing everything that you shouldn’t have done and blaming & blogging about the damage you have caused.
September 21st, 2011at 8:44 pm(#)
Hi bud – yes, I called Sanitred, many times, both before and after I used their product. Over the phone, they told me bleach was fine as long as it was low concentrations – specifically they said do not use “Shock” treatments but a few tablespoons in 80 gallons would be fine to treat the drinking water. So that’s what we did. You know that city water has chlorine in it too. Call Sanitred yourself. When I asked about chlorine in city water and small amounts of bleach to treat drinking water, they said that’s fine. We did not use concentrated bleach!
Regarding the alcohol – yes, they told me I should not have used it, and the manager blamed that for all the problems. My mistake in using it – but realize all the problems occured BEFORE I ever used rubbing alcohol in desperation to clean the oil off the surface about 8 months after the original application (when I had forgotten what the written instructions said). So the alcohol was NOT the source of the problem. I couldn’t get the manager at Sanitred to understand that either. Let me say it again – we did not use any alcohol before the continuing oil formation problems occurred, so the alcohol cannot be the source of the problem. Something went terribly wrong during the application, and I have no clue what it was.
If you think I’m at fault here and the product is great – good, go for it and good luck. Hopefully it will work for you. I’m just reporting my experiences, letting others know things can go terribly wrong for unknown reasons, and if you do have problems, I’m going to tell you how I was treated by the manager when I called back for help. I did not call screaming and yelling, and pointing the finger at them – no, I called and explained the problem, explained what I had done and asked for help about what could be wrong and what I might do to rescue the situation. After the first support person was stumped, he handed me to “the manager”. It was the manager who immediately started aggressively blaming my methods and the use of alcohol for everything, saying “you put something in our product to make that happen” – without listening to what I was saying about the order in which events occurred. Our conversation went in circles with her insisting that oil only forms during curing, so I said it must not be cured because the oil keeps reforming, and she said it definitely would be cured after 9 months and the oil will stop forming, so I said where is the oil coming from, and she said you did something wrong because this won’t happen with their product, and I said I followed the instructions during application….It just got stupid. When I summarized her nasty stance as “so you’re telling me that it couldn’t possibly anything wrong with your product, and that everything is all my fault” she said “yes”. So I said, “well I think the boating world would like to know how you treat customers” and she said “that will hurt as a lot” and hung up. Have you ever had a customer service person hang up on you? I never have. I am not the sort of person who draws that kind of response. Also, she clearly exhibited a complete lack of interest business from boaters. For that reason alone, I would be very hesistant to use their products again.
In the several phone conversations I had with Sanitred both before purchase, during application, and after disaster, I ended up speaking to “the manager” a few times. Each time she had a rather nasty tone. I can say the others I spoke with at Sanitred were helpful, supportive and nice. It’s just this manager that in my experience is short and annoyed by everything. I wish I knew her name so I clear the names of the other Sanitred staff who did help me over the phone.
It probably *was* something that we did wrong – but it remains a complete mystery as to why and the manager at Sanitred wasn’t interested in helping us troubleshoot the problem. We read the instructions carefully at the time of application (the mistake with alcohol was 9 months later!! and their website says “most solvents are OK” It’s the printed documentation that comes with the shipment that says not to use alcohol). If we couldn’t get the stuff down right after all the care we used in applying it, then I think the product might be a little finicky. Or maybe we had a bad batch. Or maybe the phase of the moon was wrong. Or maybe we just had a bad day (no, we definitely had a bad day!). Regardless of why, I have a water tank that’s destroyed and had an extremely bad experience with customer service with the management at Sanitred. Now anyone who reads this blog will know that, and proceed to use the product at their own risk.
Marilyn
September 23rd, 2011at 12:18 pm(#)
hi, I coated an entire boat bottom wood planked inside and outside with permaflex sand color. Used about 25 gallons and was a complete success. I did a good job pulled it all apart for a proper repair with lots of new wood.
It is floating with no leaks for over a year.
I was reading your entry and wondered why you used acetone on the oil between coats. Ordinary dish soap and water is recommended, acetone just pushes the oil around.
Anyway, I dont understand what happened to your tank.
FWIW, you can try something else fairly cheaply. Use PL Premium polyurethane construction adhesive (buy at lowes or HD in a big cartridge) and paint it in layers inside the tank. You can even use some FG cloth and glue that in on top of the permaflex. The PL is an excellent sealer and has no oil issues.
here is a shot of the bottom in permaflex
http://farm5.static.flickr.com/4097/4772521069_994b3306a0_b.jpg
October 9th, 2011at 9:08 pm(#)
Hi Scott – We used acetone between layers because during the multi-layer application, we didn’t get the next layer down on time before the previous layer formed an oil film. The instructions warn about this – get the layers down quick and in succession before the oil film develops – but it was very late and we needed some sleep before putting down another layer. We had hoped to get back in the AM before the oil formed, but no luck. We used acetone because we tried cold water and soap with no success. We didn’t have a source of hot water available to us at the time. Acetone, being a better solvent than water, seemed to do the trick. It felt oil free after its use. If I recall correctly, the printed documentation says that Acetone can be used as a thinner, though toulene is preferred. That’s why we tried the acetone, and it seemed to work at the time. The surface felt squeaky clean.
Later, after this sludge kept forming on the finished job, I tried *hot* water and soap to remove the oil, and it did not work. After many times of cleaning the tank with soap and water, in desperation, we made a bad mistake and tried alcohol. It’s not that we saw the alcohol change anything, its that the use of alcohol has become the reason people like to blame for the problem. But the problem occurred before the use of alcohol. Maybe it was the acetone wash?!?!?
All our experiences are contrary to other people’s experiences and Sanitred’s claims, so again – something went terribly wrong with our application – I have no idea what. I am certainly not going to try using it again. I’m glad to hear it worked for you.
Thanks for the tip about PL Premium polyurethane. We might try that on a little piece to see if it sticks. I’m worried that whatever happened to cause all the oil formation means that the Sanitred product is badly affected and nothing will stick to it. Right now, we are using a plastic liner inside the tank. That’s not an ideal solution either, as the water tastes of plastic.
Marilyn